


Post by SidiousJK on May 14, 2015 18:22:32 GMT -8
After some spirited off roading, I developed a chirping sound coming from the rear end. I also noticed that the driver side rear tire was a little wobbly. Both of these symptoms helped me determine that it was time to change the stock axle shafts for some chromoly shafts. I went with the 10 Factory shafts, which were purchased through Northridge4x4 with the bearings already pressed.
Step 1: Chalk the front tires

Step 2: Jack up the rear end, and place the Jeep on jack stands

Step 3: Remove the wheels. You will also have to remove wheel spacers if you have them

Step 4: Remove the caliper. It is held on with two 18 mm bolts. Hang, or zip tie the caliper to something so it does not hang by the brake line

Step 5: Disconnect the speed sensor. You can see it hanging down at the bottom of the picture

Step 6: Disconnect the emergency brake

Step 7: After unbolting the 4 19mm bolts from the rear, remove the axle shaft along with everything connected. Some people use a slide hammer. My passenger side came out easily, but the driver side needed a few taps with a mallet.

Step 8: Pull out the bearing race. Mine came out by hand.

Step 9: Unbolt the speed sensor with an 8mm socket

Step 10: Take the brake shield and everything that is attached and transfer it from your old shaft to the new shaft.

Step 11: All transferred over to the new shaft. Bolt the speed sensor to the backing plate using an 8mm socket

Step 12: Slide the new axle shaft into the axle. You will likely have to turn it a little to get it in. It is ok if it is out a little. Once you tighten up the rear 19mm bolts it will not be sticking out any more. Please remember on Rubicon JKs, the driver side axle shaft is shorter than the passenger side. On non-Rubicons, they are the same size and are interchangeable.

Step 13, go in reverse starting with step 6 going back to step 1, reconnecting everything.
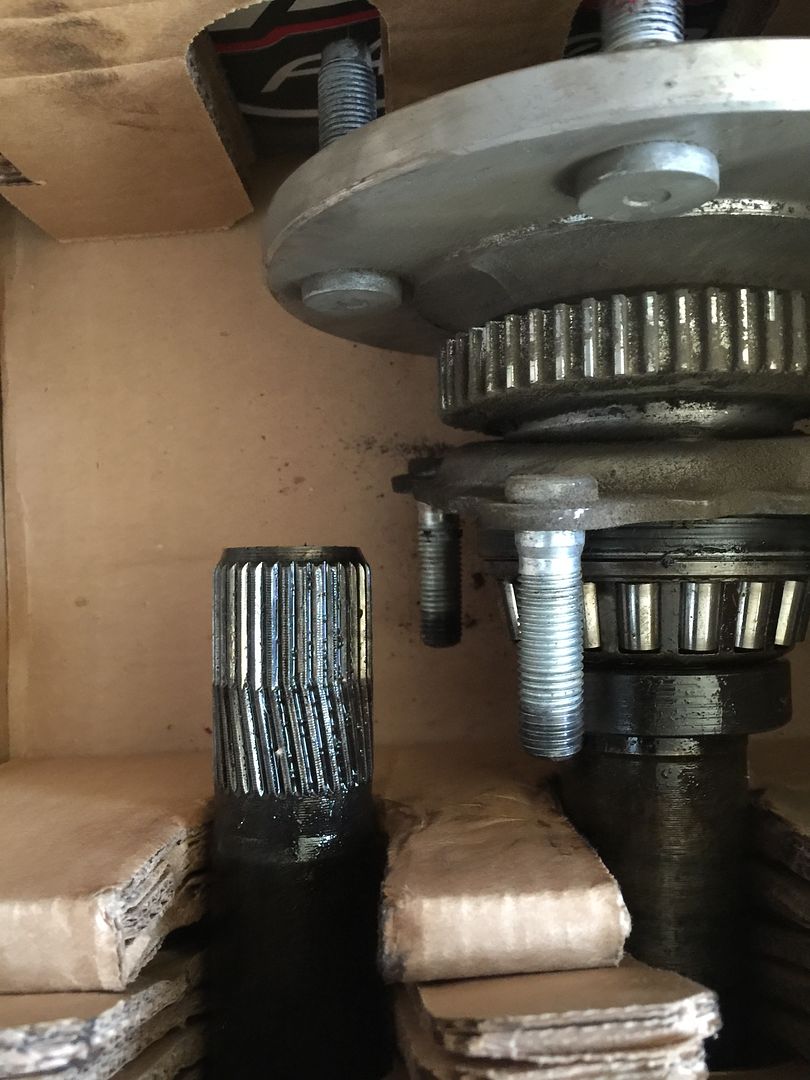
This is what my stock shaft looked like after taking it out. Notice that the splines are twisted. I was one obstacle away from breaking it.
Step 1: Chalk the front tires

Step 2: Jack up the rear end, and place the Jeep on jack stands

Step 3: Remove the wheels. You will also have to remove wheel spacers if you have them

Step 4: Remove the caliper. It is held on with two 18 mm bolts. Hang, or zip tie the caliper to something so it does not hang by the brake line

Step 5: Disconnect the speed sensor. You can see it hanging down at the bottom of the picture

Step 6: Disconnect the emergency brake

Step 7: After unbolting the 4 19mm bolts from the rear, remove the axle shaft along with everything connected. Some people use a slide hammer. My passenger side came out easily, but the driver side needed a few taps with a mallet.

Step 8: Pull out the bearing race. Mine came out by hand.

Step 9: Unbolt the speed sensor with an 8mm socket

Step 10: Take the brake shield and everything that is attached and transfer it from your old shaft to the new shaft.

Step 11: All transferred over to the new shaft. Bolt the speed sensor to the backing plate using an 8mm socket

Step 12: Slide the new axle shaft into the axle. You will likely have to turn it a little to get it in. It is ok if it is out a little. Once you tighten up the rear 19mm bolts it will not be sticking out any more. Please remember on Rubicon JKs, the driver side axle shaft is shorter than the passenger side. On non-Rubicons, they are the same size and are interchangeable.

Step 13, go in reverse starting with step 6 going back to step 1, reconnecting everything.
This is what my stock shaft looked like after taking it out. Notice that the splines are twisted. I was one obstacle away from breaking it.

